Wednesday, November 9, 2016

Custom gauge panels, final take

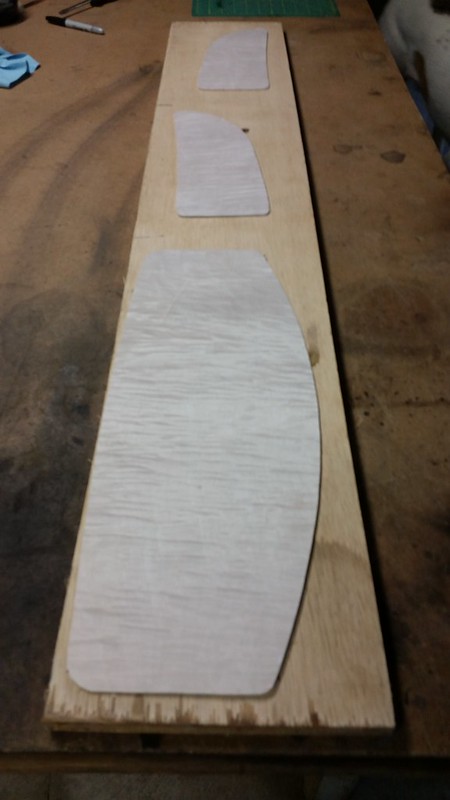
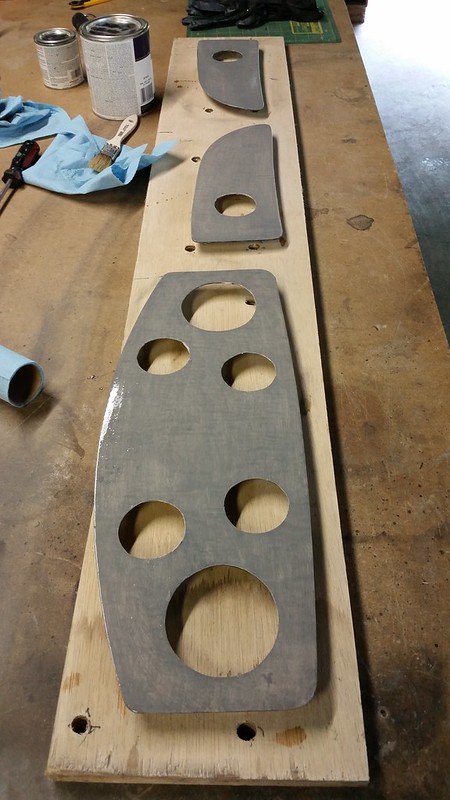
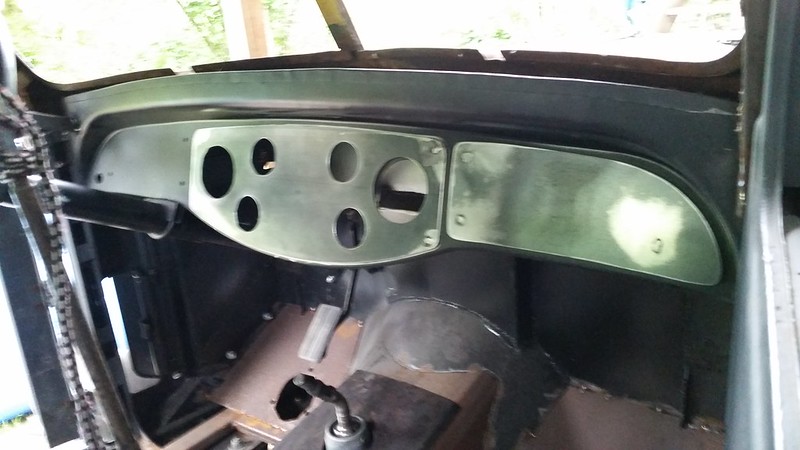
Well, I hope this is the final take anyhow!  We used paint-on contact cement this time for the veneer, clamped between boards overnight.  Then very light sanding and a 50/50 Ipswitch Pine/Dark Walnut stain mix.  Allowed to dry 2 days and then epoxy pour-on finish.  There will be drips on the underside to clean up, but I have high hopes this will work this time!

Tuesday, October 25, 2016

She's alive, part deux

We knew the second that we started the engine for the first time in 4 years, that we would have to get rid of the vacuum pump.  Without being attached to anything, they are VERY noisy.  They were used for the brakes and for the vents in the heater system.  Since we are using neither of those things, the pump was unnecessary.  Now, there is more room to run the power steering lines without interfering with the inner fender too!

OH, and the initial start was without the serpentine belt because the alternator needed shimmed just a little bit for alignment.  I worked on the alternator bracket while Brian worked on the vacuum pump.  Productive day!


Saturday, October 15, 2016

She's alive!

https://youtu.be/gqc6EYvSeqY

We were determined this weekend to hear that cummins for the first time since it was taken out of the Dodge over 4 years ago. 
Success!  There might have been tears in my eyes...

Wednesday, October 12, 2016

Cool it!

Well, finally we have radiator hoses that will work!
The first time we went to the parts store, we came back defeated and thought it couldn't be done.  I searched online for hours to try to locate the lower hose.  The only thing I got from my search was a silicone reducer that we thought would help, but didn't end up using it afterall.
After being defeated initially, we gave up for a while.  The time has come that we are getting so close to starting it, that it was now a priority.  So, after two trips to NAPA(and a very capable clerk), we have hoses!  I had to buy 3 total and all had to be trimmed to fit, but it is a miracle in my eyes!  The fitting in the middle of the upper will be for the electric fan sensor since originally the Dodge had a clutch fan that was off-center.

Friday, October 7, 2016

brakes!

We did finally 'finish' the brake system - I say 'finish' because we do have a leak to address before we go any further (probably one of my double flares that wasn't perfect).  So, more brake line needed before the weekend (we don't want to take chances with rebending anything, better to just start with new after a mistake!)

Here is the view of the master cylinder from the access hole under the seat:


And, below the seat:
(the bracket that holds the master cylinder and the air can has a cover that is not on yet).

We tested the brakes as much as we could with it not running yet, and all corners work!  We have an adjustable proportioning valve as well as an adjustment in the air can, so I am sure there will be tweaking here and there after the truck is running - which doesn't seem that far off now!!!

I started on the fuel lines and got them from the tank, through the bulkhead fittings we put in (pre-existing) holes in the frame:
there will be a wire from that brass fuel sending unit screw to the cab as well, but wiring is a little ways off yet.  We are still on the fence about either building our own harness or ordering a pre-built hot rod harness.

I had to get a new set of tube bending pliers to bend the 5/16'' fuel line - so that is probably on the 'to-do' list for this weekend (although it is supposed to rain all weekend, so that might change).

I was sick Sunday, so wasn't up to working on the truck - but Brian got the air compressor installed and the bulkhead fitting for the airlines through the fuel-tank-turned-battery/air compressor-box.  (will add a photo next post).


Monday, September 19, 2016

brakes and brackets

We came home Saturday evening from hunting so we could work on our truck on Sunday.  We got the back section of the brakes bent, but ran out of brake line to connect from the rear to the master cylinder (and valves in between).
Then, we worked (mostly Brian) on customizing the brackets for the battery box (which used to be a fuel tank).  They used to stick up several inches over the frame rail, now they are flush and look a zillion times better!


This is the only 'before' pic I could easily find with the battery box - you can see how far the brackets stuck up before:

Next weekend, finish the brake lines, then maybe start on the fuel lines?  We will see!


Tuesday, September 6, 2016

Floored

I am just floored..... because we have floors!  Haha :)

Last weekend, we finished the floor pans and the seat pan.  Such an exciting hurdle to clear.

Prepping the drivers side of the seat pan for welding.  We drilled holes for rosette welds along any area of the perimeter or supporting structure on all the panels.  Here Brian is working around the access hole for the master cylinder:


Seat pan welded on and the pockets for the seat attachments look great with the trim (scavenged from a Suburban the same year as our Suburban since the seat we are using is the 3rd row seat)

Finally everything installed and ready for primer:


Next step, epoxy primer!


Then, the cab was unbolted from it's mounts and slid back.... we were hoping to tip the cab to do the finializing on the underside, but when we went to tip it, it started to rack.... so we left it just lifted up and we took out the driveline instead to work underneath it.  It wasn't fun for Brian to do the final welding overhead, but it got done.

So, after the final welds were complete and the rust taken care of, the underside got a coat of epoxy primer, then body seam sealer on all the joints, then two good coats of rubberized undercoating!

We sealed the seams on the topside too - and will paint over it soon after we get a couple more things finalized on the interior.

Now, we are going to work on the front brake lines since the cab is out of the way!


Stretching the roof

Since we decided to use the roof from the 37 because it was sturdier built (over the door area was boxed in steel vs. the 36 was originally wood, so was just a shell), we had to stretch it a bit to fit unfortunately.  It was just about a half inch too short!  We cut a section from the 36 roof to fit and it worked out pretty well.  Doors fit good now and we have a pretty even reveal, yay!


Tuesday, May 24, 2016

Gauge panels, one step forward and 2 steps back

Well, I thought we had settled on doing a tiger maple veneer on the gauge panels, but it just hasn't worked right.  We decided on a gray stain/dye to tie in with the gray leather seat we are using.

So, we prepped the steel panels with epoxy primer and some gray primer over that (the epoxy primer is black and we didn't want it showing through on the edges).


Then, we used spray contact cement to adhere the veneer and trimmed around the edges and sanded smooth:

We stained them with a Varathane 'weathered gray' stain.  HO-HUM.  The test piece turned out SO much better.

This was our tester, but we tested it on unsanded veneer (our first mistake):

The stain was too opaque to show much the figure of the maple in the sanded veneer :(
Major disappointment.
We chose an ivory paint for the background on the dash and I really like the color of the gray against it, but I was hoping for the figure of the tiger maple to show and it just didn't.  Not to mention, the next day it started lifting around the gauge holes and that was NOT acceptable.  So, off the veneer came and we are back to square one.  Deciding how to finish the panels has been the hardest of our decisions on this project for some reason!  I really want them to be special.....
Anybody have any good suggestions?  And, no, vinyl is NOT an option :P  Maybe gray leather, but that is near the bottom of my list.


Thursday, May 19, 2016

Gauge panels, part deaux

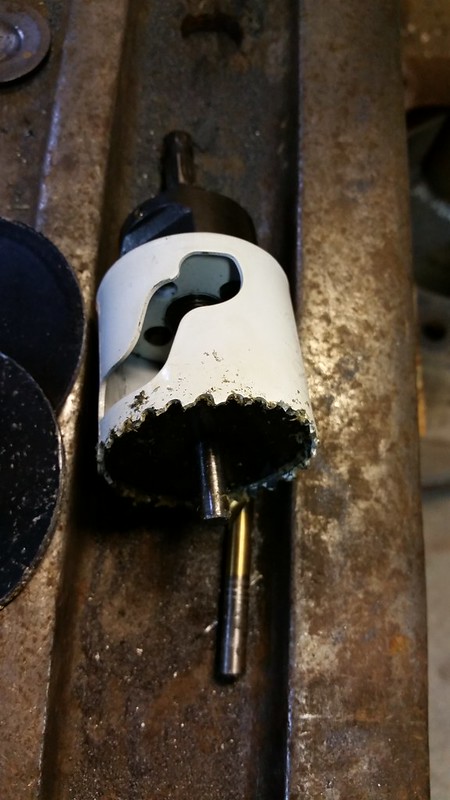
I did some researching about drilling good holes for the gauge panels before we dove in - and we decided to use a hole saw slightly smaller than the hole size necessary and then fine tune them.  We also decided to predrill the 1/4'' center hole and replace the center drill bit in the hole saw with a 1/4'' rod so the hole saw didn't ''walk'' away from it's intended position.  This worked very well!


We got all 3 panels prepped for the gauges with room left for other dash necessities to be added later.
(forgot to take a pic with the 3rd one over the steering column, oops!)


We ended up drilling a smaller hole for the dual air gauge centered over the steering column - and then on the opposite panel, the hole for the clock in the same (mirrored) location.

The decision has not been made yet on how to finish these panels......  leather is at the top of our list.  Personally, I would like to use a gray leather to match the seat - but Brian wants to use buckskin if possible.  We have several buckskins I inherited from my grandpa, but they might be a little thick to wrap around the tight radius' - so we plan to do a test piece and see if it works.  I would like to do the door panels and the visor in the same buckskin if we go that route, to tie it all together.  I think the backing of the dash will be a cream color - similar to original.


Monday, May 2, 2016

custom gauge panels

So, the Diamond T was out of the patio for a couple weeks while we did a spring cleaning for a family get-together, but now she is back inside.  We had planned to work on the roof section, but we didn't have enough steel for bracing to do what we needed to do.  So, we decided to work on the dash.  We are going to use aftermarket gauges, so new dash panels needed to be made since the new gauges are smaller than originals.  Brian drew around the original deluxe gauge panel onto the dash - the outside of that we dedided to replicate the same size/shape.


He got to use his new plasma cutter that he got for Christmas to cut out the panel:

while I created a template for a new larger gauge panel side section:


Brian finished the shaping of the gauge panel and added studs in the original location.  Now, we will just need to cut the holes to the right size for the gauges and finish the panel.  We are unsure how we will finish it.  Chrome?  Powdercoating?  Wrapped in Grandpa's deer leather?  Totally undecided at this point.

We got both of the larger side sections cut out (forgot to take a pic) - but we will need to finish shaping them and add studs to them next weekend.  The larger side section will cover the hole by the steering wheel that was originally for the ignition switch I think. An ignition switch might still go in that spot, but we have more options where exactly to put it with it covered up.  Then, after we get our gauges, I will be able to sell the original stainless set (and original gauges) for someone who wants to go back to original on their project.


Friday, April 1, 2016

Off with her head

We decided that the roof just was too far gone to use......


So, we decided to make it a convertible.....


Now, how is that for unique!!!  Pretty sweet, huh?!


.
.
.
.
.
.
.
.
.
.
.
.
.
.
.
.


APRIL FOOLS!

We actually are using the roof section from our parts truck - because it is framed in steel, where our 36 roof section was framed in wood.
See that door reveal?  So much better than the 36's!

 And the a-pillar - yes, yes!  OH how I wish we would have started this project with this 37 - we would have been SO much farther along!
 See how the 36 didn't have that a-pillar framing - BOO.  The hinges were even bolted to wood in the 36.  The 37 had MINIMAL wood - just on the upper corners of the roof section and along the back for bracing.  The 36 had it *everywhere* inside, even the floor by the door opening (the 37 is steel there).

We have the parts truck completely disassembled now - and ready for the engine to be removed.  I think we have a buyer for the chassis/title, which will be nice to get that out of the driveway!

Brian has a little fun with the fenders from the 37
 I think we will have to find another set of fenders for the back, hopefully in better condition - we need at least the drivers one to repair the 36's drivers fender


And, to reiterate, we did not do a ''chop'' - this is the stock height of the roof!  Chopped from the factory :)