Monday, September 29, 2014

skin me

Oh, some super exciting progress here at the workshop!  We have re-skinned the lower half of the passenger door!  I am ecstatic!

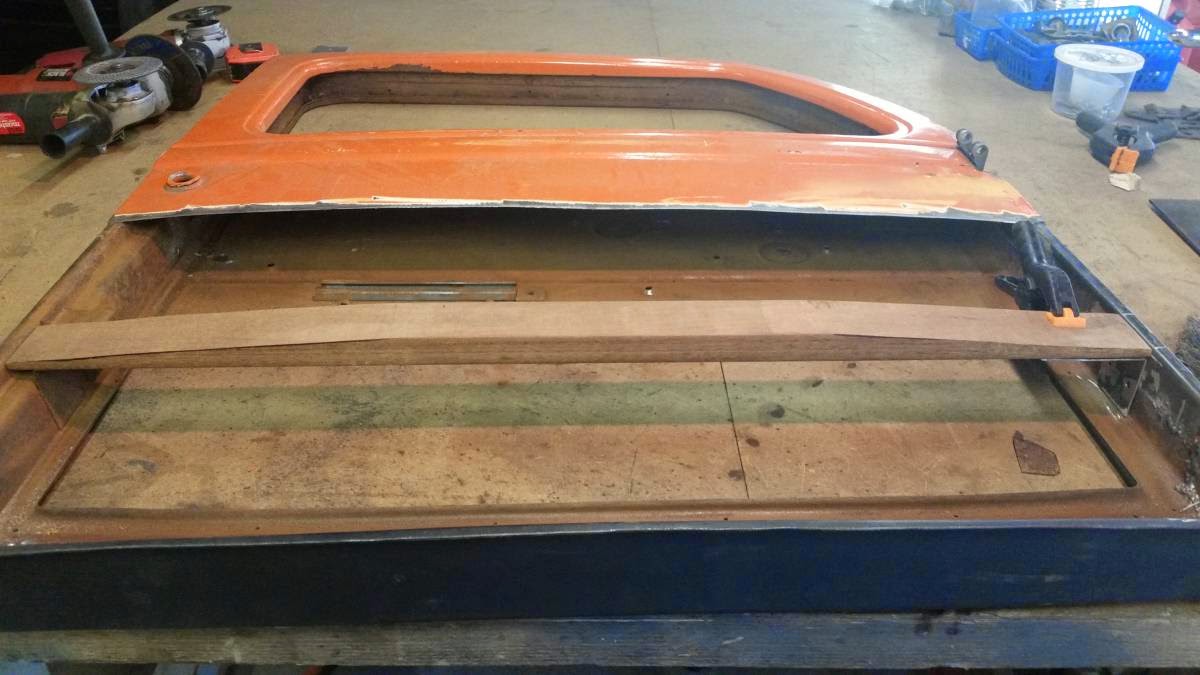
First we started with careful measurements, cut the 18g sheet metal to size, then bent the 3 edges on our brake.

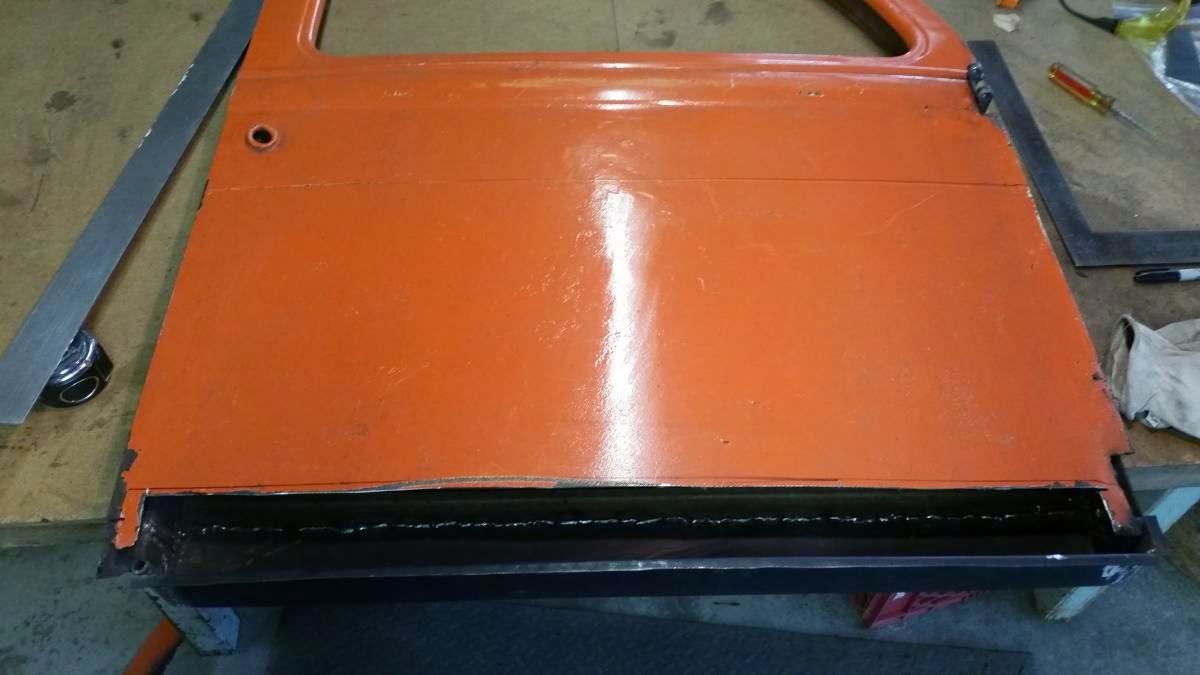
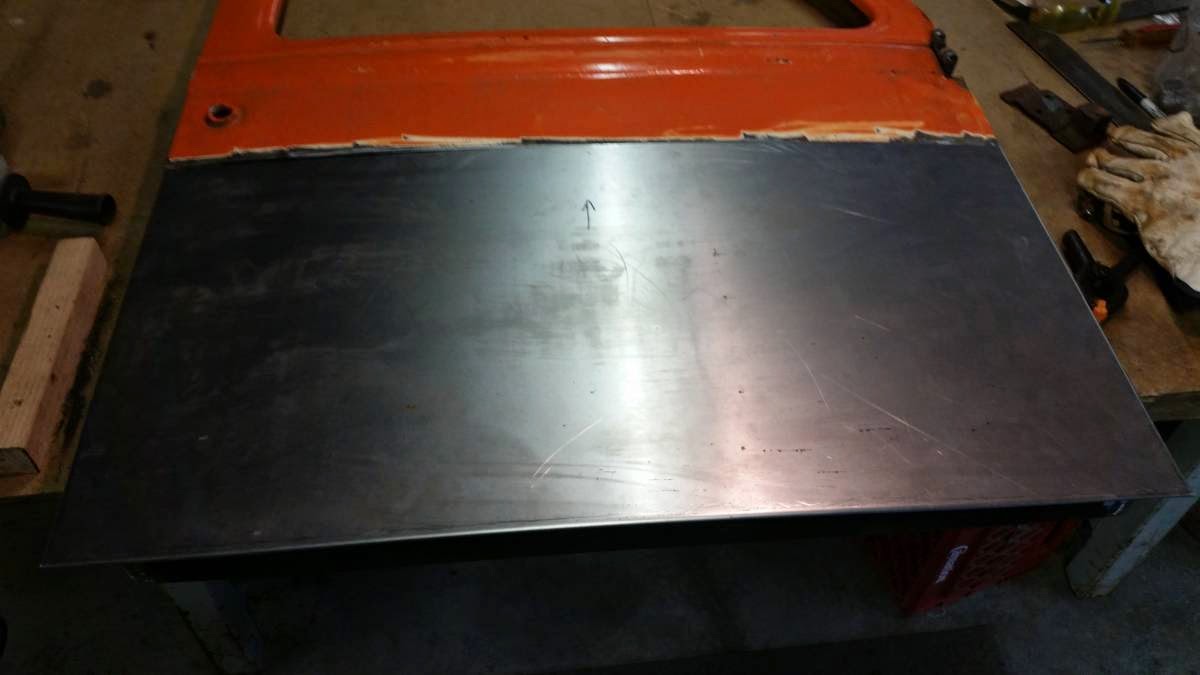
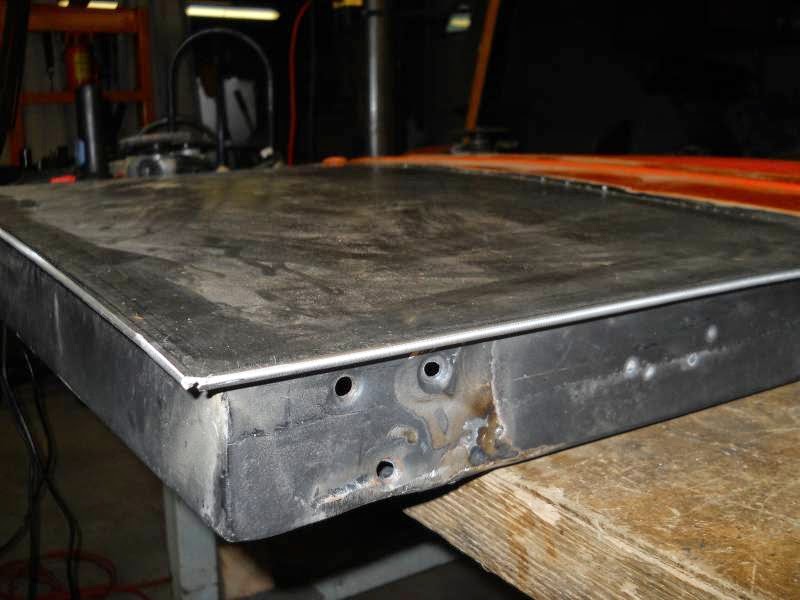
 Our brake does bends to 135°, so this was perfect for the tool that we purchased that does the rest of the bend when it's on the door.  So, with a little tweaking on the length of the patch piece, we put the panel clamps on and Brian spot welded it in place on the face, being careful to cool down each weld as he went.


 We removed the panels clamps and he filled in a few more spot welds


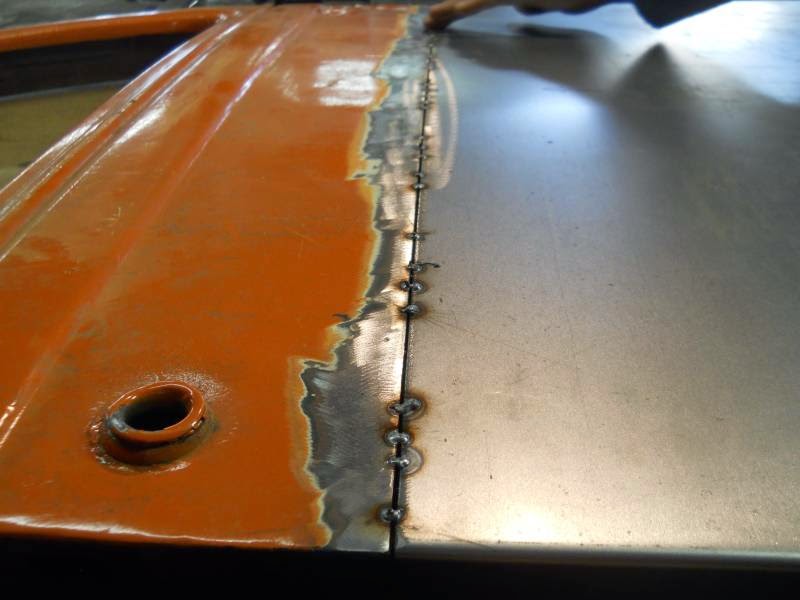
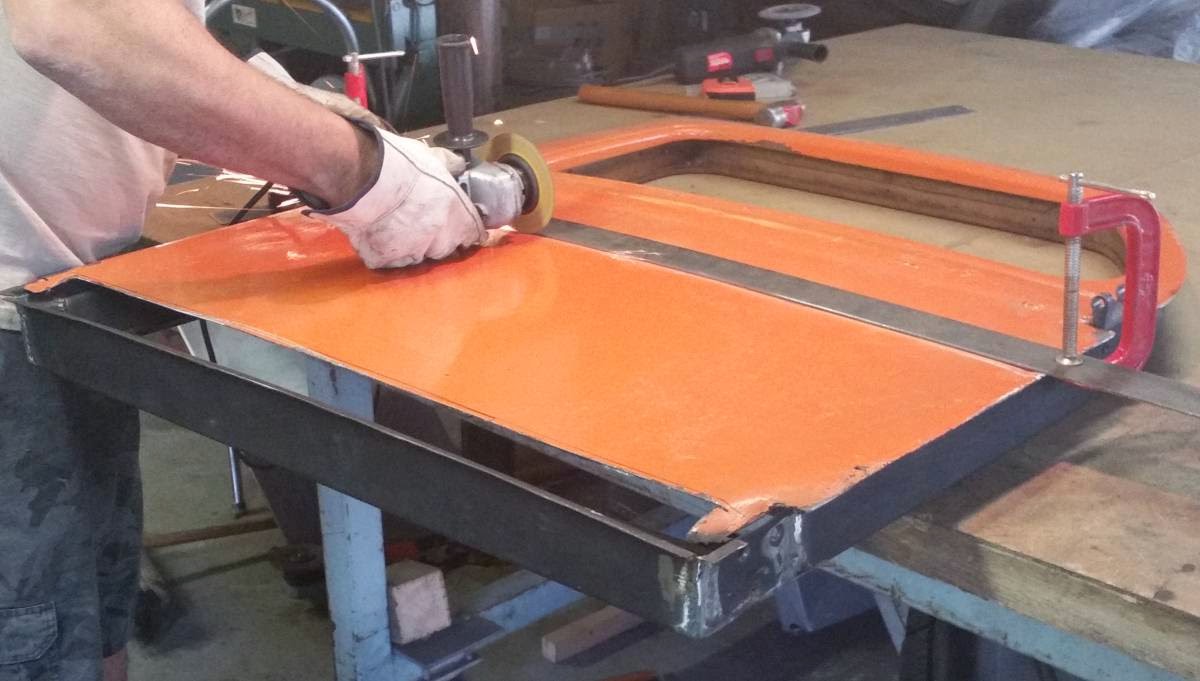
Then, we were ready to use our new tool - ''The Skinner'' by Wivco.  Worked pretty slick!!!  You do have to use a dolly and hammer to get the seam started for the tool (I used a block of fir for the dolly so as not to damage the outside of the skin).  The Skinner tool has teflon on the skin side of the tool, so it doesn't cause any damage to the outside.  It does make some little marks on the fold side from the traction on the roller, but they won't be noticable once it's primed and painted.


Here is a short video of the tool:

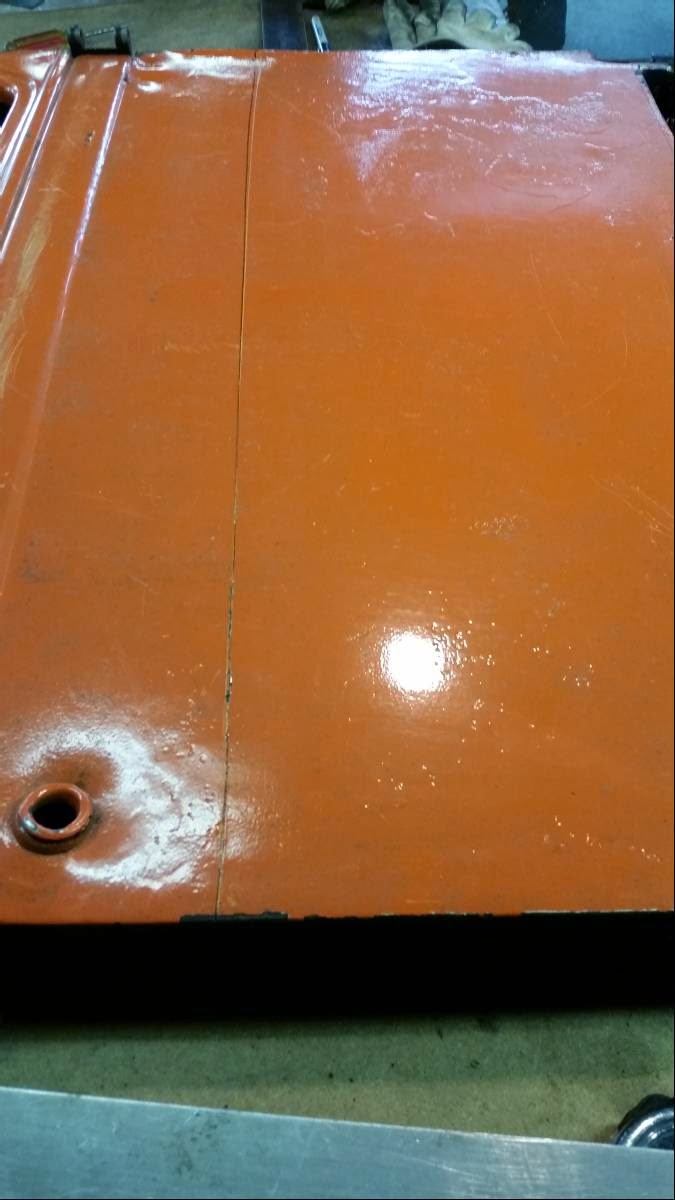
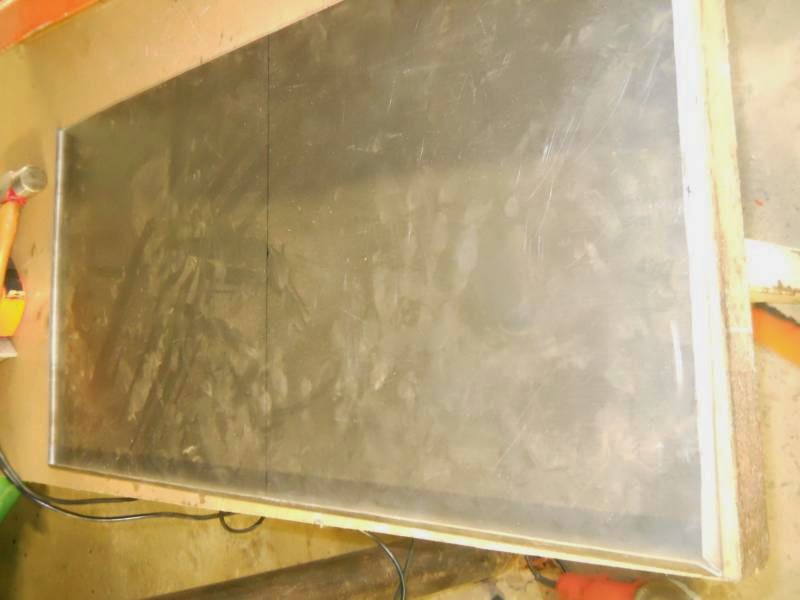
And, the seam after it's been rolled down.  Awesomsauce.  (The corner will get welded)


Double awesomesauce!

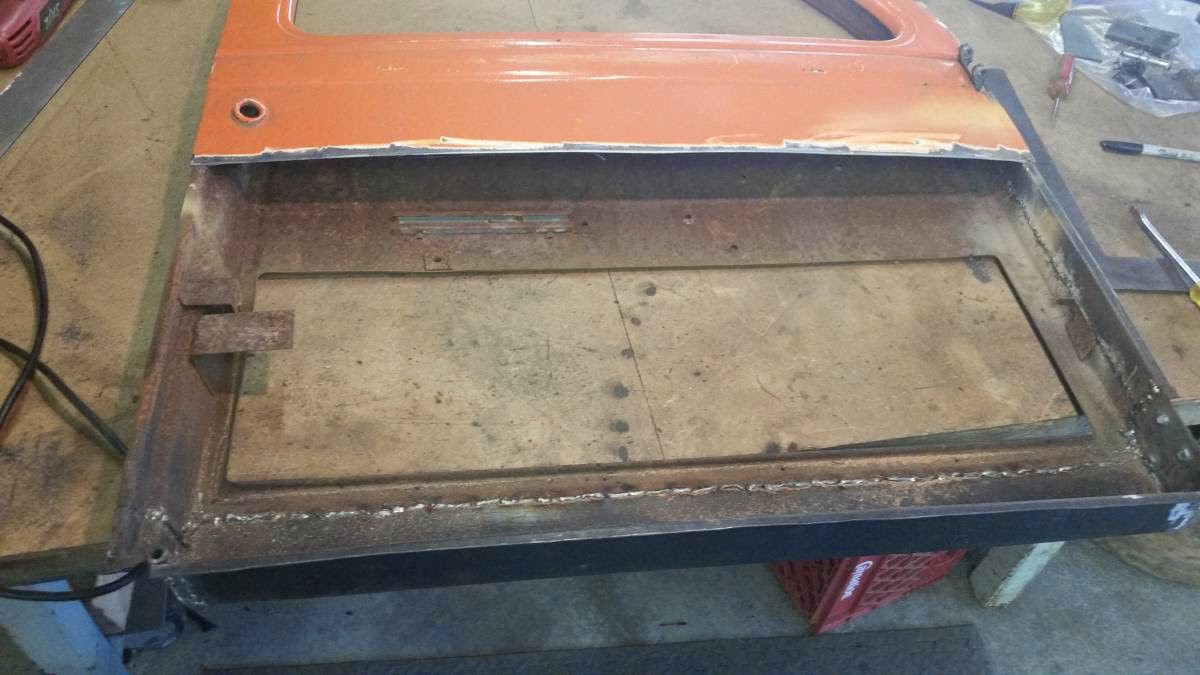
Yes, I am very excited about how well this turned out!!!  Now, we do need to cut a little notch out for the lower hinge.  We we are tentatively looking for ONE more hinge because I think we might put a third hinge on the doors if we can find just one more hinge.  We only have 5 total usable hinges right now, so we don't want to commit to 3 hinges in either door until we find a 6th hinge.  Which might be tricky :P  But, with how much flex the doors seem to have, I really think a 3rd hinge like the original doors had would be good.  The '40 that we got these doors from only had 2 hinges, but the original doors had 3 (which were all rotten beyond use, but the previous owner had found 5 rebuildable hinges that we had restored).


Monday, September 15, 2014

outta gas

After some nudging by me, we got some work done on the truck on Sunday......

We have been working on re-skinning and stiffening up the doors.  Brian was ready to do a little welding, but realized that he had turned the gas on the welder all the way ON instead of OFF the last time he welded.  There must be a leak somewhere because there was NO gas :(  That meant no welding, darn!

I took these pics with my new Galaxy S5 - it has a 15 megapixel camera, but the pics are odd shaped compared to what I'm used to (longer in one direction, I guess like a flat-screen monitor)

We decided how much rotten skin had to come off, marked the line:


 Scary to cut that much off, but it had to be done


 Yikes!


Well, no turning back now!


The orginal door had an oak support for the skin - so I made 2 from a hardwood decking material.  It's as hard or harder than oak and has less open grain.  Brian made a new bracket for the wood support - and there is where we realized we had no gas for the welder, boooo.


You can see the slight curve shape the wood has for the skin-side.


We actually made this new skin on our brake two weekends ago - 16g steel to match the orginal thickness.  Our brake was able to bend the edges at about 135degrees, so we slid it on from the bottom to test fit.  We will have to trim it about 1/4'' off to get a shorter reveal on the bottom edge, but it looks about as close to perfect as we could expect!  We are very happy how this turned out!  We were very nervous about how we were going to crimp the skin when we were ready to have it finalized, so we did some googling..... and realized that our best option was to get a tool for the job.  We might not have if we only had a small section to do, but both doors need this much replaced.  So, I've ordered the skin-crimping tool  and am praying it gets here by next weekend! :)


The view from the inside.  The wood support will be screwed to the brackets (one new, one original)

Now, I'm off to the welding store today to get some gas - and maybe some more panel clamps if they have them (we just have 5, it would be nice to have twice that many when Brian welds the skin on).

Karin

Sunday, August 24, 2014

steering done finally

The steering is done, done, and DONE.  Finally.


Brian cut the tube on the slip yoke side to length, then notched the end to fit the rag joint connection (and welded it really well).  We were able to take the part forward of the rag joint apart at the steering column to slip the heim joint onto it (and it fits perfectly).  We did have to move the steering column into the cab just a little more to get a better angle on things, but just about an inch or so.

It has no clearance issues with the fender either, YAY!  Sooo glad to have this part of the project behind us!


And a video of it in 'action', LOL:


Karin

Wednesday, July 30, 2014

steering

There are a lot of things you can 'make-do' on a project like this, but steering is not one of them.  This needs to be safe (and not bind or hit the frame rail/suspension!)


Steering column from a 70's Peterbuilt.  1''.


Steering box from a '91 Dodge 250 pickup.  3/4''.  We used the complete front end and engine/trans from the Dodge, so the steering box was already in place and we're trying to make it work as-is.


Steering shaft from same Dodge with ragjoint.  If I remember right, this was directly to the steering column on the Dodge.  The DT cab is so much narrower though, so the steering column is in further toward the center......


Distance of 29-30'' between steering box and end of steering column.  Possible interferance issues with frame rail AND fender.....


stock Dodge shaft with the rag joint (attached to steering box, but not slipped on all the way) and the mystery slip yoke/u-joint that fits the steering column (but not slipped on all the way):
We DO have a 3/4'' heim if we needed to support the shaft somewhere......


Karin

b-pillar work

On Sunday, we decided to try to tackle the beginnings of the b-pillars.
What is there now, is just the sheet metal.  No structure behind it.  So, I got some 1.5''x2.5'' rectangle tube.  Since it slopes inward above the latch area, I cut several slits in the tube, brought it together to form the curve, then Brian welded it up:

I forgot to get a pic after the welds were ground smooth, but I am very happy how it turned out!  Now we should make the other side while it's fresh in our minds how we did it :)

Karin

Monday, July 21, 2014

more interior work

Saturday, we worked on the seat pan.  When we originally made it, and then put in the seat - we wished we had done round corners on the front.  So, Saturday, we fixed that :)


  MUCH better!!


And, now, we have both front floor pans cut (not welded in yet as we plan to do that from underneath).
And, even though the gas pedal is a bit too high, it's still OK.  I can mash the gas just fine :)


Karin

Tuesday, July 15, 2014

Floors and doors

Our power was out for the first half of the day Saturday (problems with the power station I guess), so we weren't able to get anything done Saturday - but we did a little Sunday.  Although progress was slooow because it was so flippin' hot out!

I got the pieces cut to frame in the passenger side floor and Brian welded them in place.


Brian got a section of the drivers floor pan cut out - wohoo!


Pictures are kinda out of order, but this is after we got the foot pedal cleaned up.  

Brian disassembled it and wire brushed the aluminum base


While I sanded, primed and painted the pedal itself.  Now, if we could just find a rubber pad for it.  I think Brian said it came out of an old Autocar that was a good friend of his dads.

And, in an attempt to get some structural strength back in the door, I cut this piece of hardwood for it.  I don't remember what the wood is called, but it's almost as hard as oak and is used for flooring (local lumber yard gave me a 6' chunk of 1x5 becasue the size made it unsellable)  I ripped 2 pieces at 2'' wide, then marked the curve from a template I had made from an original piece of oak that was in the same spot.  (It is 1'' thick in the center and less than 1/2'' on the ends to fit the gradual curve of the outside of the door).  Our bandsaw has been neglected for many years, but I am sure glad we have it.  It would have been really difficult to do on the table saw, LOL.  I cut the curve on the bandsaw, then sanded the cut edge on the stationary belt sander.  I cut out a matching piece for the other side while I was at it too, so all I have to do is sand that one to install it later.

Karin

brownie shifter installed


Tuesday, July 1, 2014

steering and pedals and brownie shifter, oh my!

We finally have the steering column installed, and the pedals mostly installed, whew!

(sorry, terrible pic)
We don't need no stinkin' expensive Ididit column!  Brian made the bracket to hold the steering column (from a 70's Pete) with a piece of pipe just a little bit larger diameter than the column, then added slits and tabs so it could clamp the column securely (with some rubber between).  Then, it has a plate welded to that clamp that is bolted to the firewall (12 or 14g, I forget - probably 12g on the firewall though, it's thick!)

Here is the clutch bracket - we salvaged it from the Dodge. (pic was before steering column bracket was done).  It's pretty sturdy, but we plan to take it back out and make it even sturdier by boxing the top in.

 Our St.Bernard puppy, Lucy, ready to go for a ride too!

 Testing out the new pedals - the gas pedal will have to be lowered a bit unfortunately.


 The brownie shifter installed!  The brownie itself will probably be quite a ways down the road, but we wanted the shifter installed so we could finish the rest of the interior stuff around it.


 oh, yeah!


I also got the floor partially framed in on the drivers side (and Brian tacked it in place - the real welding will be from the underside).  Now, we just need to add some sheet metal on that part of the floor!  It's starting to come together!!!  So excited with the progress!  Now I can't sleep at night :)

Karin